

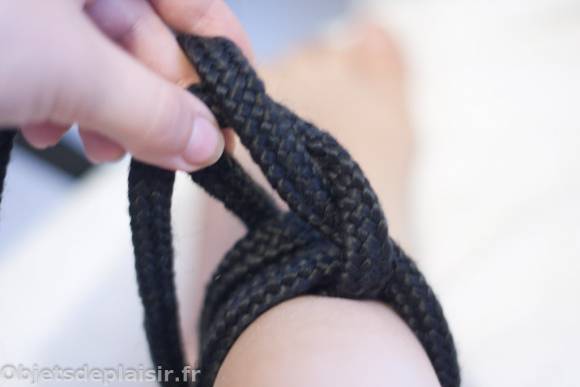
I discovered Bondage-tutorials, a site that offers simple, unpretentious bondage lessons for beginners.
Not enough to master all the secrets of shibari. But, for someone like me who already struggles to tie their shoelaces properly, something that explains a few basics precisely enough to try without getting a headache, that’s already pretty good.
So I tried a few bondage tutorials and picked out two of the easiest to do. Results in pictures.
Why bondage lessons?
Tying yourself to the bed (or another piece of furniture, or a BDSM accessory designed for it), can be great fun. No need to be heavily into BDSM to have tried the experience.
But depending on what your improvised restraints look like, two not-so-great things can happen to the person tied up:
- Case 1: The restraints come undone on their own and wander off to explore the surroundings. So, since, well, you’re supposed to be tied up and enjoying your partner taking care of you, you’re not going to let those damn ties spoil the show: you discreetly put them back in place. A minute later, they make a getaway again, and here we go again. You feel like Wile E. Coyote chasing the Road Runner, but with handcuffs. Which makes it a tad complicated to relax and enjoy the moment…
- Case 2: Ouch! The restraints tighten on their own and hurt your wrist. Which is neither sexy nor pleasant: you’re impatiently waiting for it to be over so you can massage your sore joints. Not to mention potential marks, which won’t always make a good impression the next day. (Definitely don’t try to pretend your dog bit your wrist, or people might imagine some really weird stuff.)
So, even if the phrase “learning to tie knots” tends to bring to mind sailors, scouts, or the Junior Woodchucks, taking a few minutes to “learn to tie knots” can be a significant asset for role-playing of all kinds.
Precautions to Take
It’s important that the restraints around the wrists and ankles aren’t too tight. Indeed, you absolutely must not cut off blood circulation. To check this, you need to make sure you can slip at least one finger between the rope and the skin.
The knots shouldn’t be able to tighten on their own, even if you pull on the rope.
And, of course (but is it really necessary to point this out?), never any restraints around the neck.
The Gear
It’s better to use bondage rope, made specifically for it. Bondage ropes have undergone a treatment that makes their surface softer, limiting unpleasant friction: the goal isn’t to chafe your wrist. They can be nylon or hemp. Nylon is generally recommended for beginners, so I assume it’s softer (having no hemp rope, I can’t compare).
You can buy it online, in BDSM-oriented shops and some sex shops. And if you choose well, it’s not necessarily more expensive per metre than climbing or DIY rope.
Minimalist Express Bondage Lesson
Let’s keep it modest for this mini bondage lesson. Goal: to successfully tie ankles and wrists, possibly to a bar or bed, without it being too tight and without the knot coming undone on its own in 3 seconds. In fact, you can do this by simply learning two fairly simple types of knots. Which is quite quick.
The photos that follow were taken with one hand, while tying my own ankle with the other. So please, a little indulgence! Anyway. All this to show that, without spending four hours studying the subject, you can achieve a result that isn’t necessarily super-gorgeous, but is perfectly usable.
To tie wrists or ankles: bondage lesson
The “French bowline,” or “Portuguese bowline” (thanks Wikipedia) is a knot whose special feature is that it doesn’t tighten when you pull on the rope. It’s a more complex version of the “bowline knot” (or simply bowline) (see also on Wikipedia). This knot is used by mountaineers, sailors, and rescuers, particularly for lifting people.
In bondage, it allows you to easily create cuffs around the wrists or ankles.


First, form a small loop with the rope (about a metre from its end).
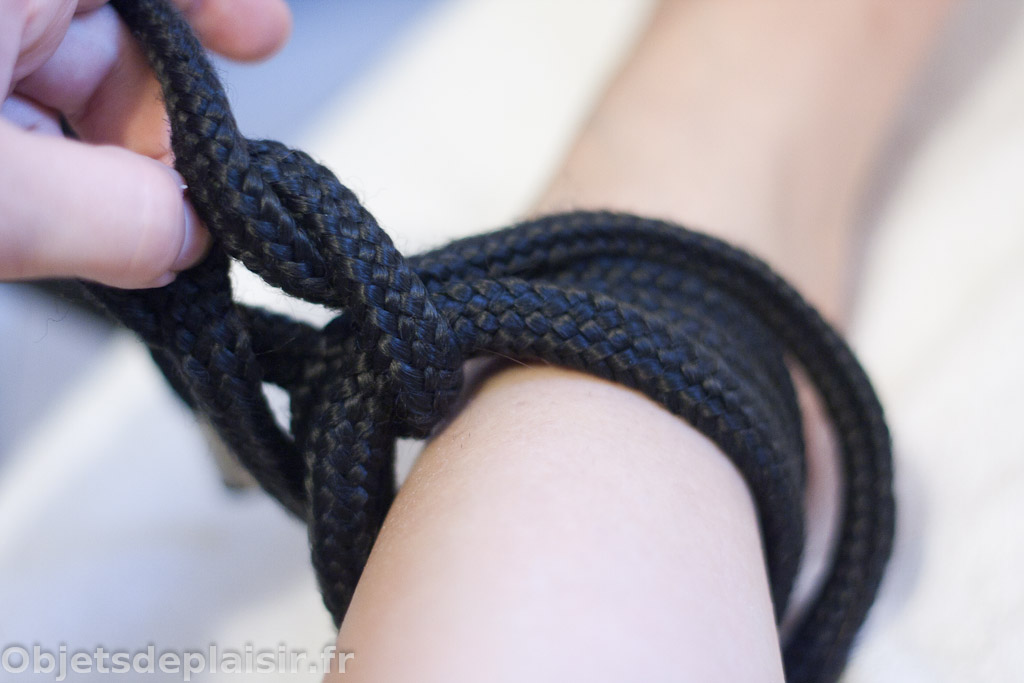
While holding this loop between two fingers, wrap the rope around the wrist or ankle, then pass it through the loop.


Repeat. One wrap around the ankle, then the rope goes through the loop. Here, we’ll do three wraps in total (but you can vary this number depending on the desired width).
At the end of the last wrap, after passing through the loop, the rope goes behind the “free” end of the loop. (For this step, I recommend taking a look at the tutorial.)


It finally comes back through the loop one last time.
The whole thing forms a “figure eight”, which you then tighten by pulling on the shorter end.


And here’s the result: a non-slip knot.
Furthermore, the rope tension is distributed among the three loops, making this restraint more comfortable than if you only made one wrap, thus reducing the risk of marks.
Bonus gift: The un-turn-on mnemonic to remember this technique (translated from Bondage-tutorials): “The rabbit comes out of its hole several times, then goes around the tree and back into its hole.”
(Just avoid saying this phrase out loud when tying up your partner.)
Edit (July 2, 2014): As the Bondage-Tutorials tutorial explaining the French Bowline is no longer accessible, here’s a short video detailing how to tie this knot instead:
To tie to a bar or fixed object: bondage lesson
Unless proven otherwise, a bedpost doesn’t have blood circulation. To secure a tie to it (or to a bondage bar, or the ring of a handcuff, or pretty much anything made of wood or metal), you can afford to use a knot that tightens when pulled.
This knot is called the “buntline hitch”. It’s another nautical knot: a “buntline” (if you find the translation, I’m interested) is the name of one of the ropes used to handle a ship’s sails.
Explanatory diagrams: on Netknots and on Wikipedia.
This knot must not be tied around a body part.
Now, the application in pictures:


First, with the rope, make a certain number of wraps around the bar (two, for example, is good, but you can also do more), bringing both ends to the same side.
Pass one of the two ends over, then under the second.


It loops back on itself, then passes underneath again. (You’ll notice how clear my sentence is… It’s better to look at the photos, and the diagrams in the original tutorial)
And it ends up looking like… a pretzel.


Finally, you just have to pull on both ends to get the knot.
Edit (July 2, 2014): Here too, the original tutorial is no longer accessible. For more details, here’s a short video explaining how to tie a buntline hitch:
Bondage Lesson: Practising on an Inanimate Object
Even if it doesn’t take very long, expect a good fifteen minutes of making failed knots. Enough to demotivate any volunteer who kindly lends a hand (or paw!), and spoil the fun of testing the technique once it’s (more or less) perfected.
So, it’s better to subject an inanimate object to the failed attempts, as it won’t get tired of any clumsy experiments. To practise following these bondage lessons, I set my sights on a chair, which proved to be very practical as a guinea pig of unparalleled patience.
Also read: a tutorial to tie your partner’s wrists.